
There are a few different ways new material parts can be added into the SmartBuild database. It depends on the part type being added. SmartBuild materials like Framing and Trim should always be added as a group with all the part lengths and colors included in that group. This is done by uploading a Material List CSV or Excel file. Some materials which we call ‘Each’ items (see list below), can be easily added one at a time.
Depending on the material part, SmartBuild also requires different information. To add a 2×4 or 2×6 framing part, SmartBuild needs to know the different dimensions and part lengths to stock in the database and the price for each part length. However, when adding a Walk Door, SmartBuild only needs to know the width, height, and price of the door. Different Categories can have different input data requirements. So, the first step is to identify what type of part is being added.
Below is a guide for adding and editing the different part types in the SmartBuild database.
Material Categories that can be used in SmartBuild:
- Sheathing
- Trim
- Walk Door
- Overhead Door
- Slider
- Windows
- Cupola (uploaded to Accessories tab)
- Foundation (Each)
- Hardware (Each)
- Walk Door Hardware (Each)
- Overhead Door Hardware (Each)
- Slider Hardware (Each)
- Window Hardware (Each)
- Cupola Hardware (Each)
- Connectors (Each)
- Fastener (Each)
- Labor (Each)
- Freight (Each)
- Trusses (Each)
Adding Framing Parts
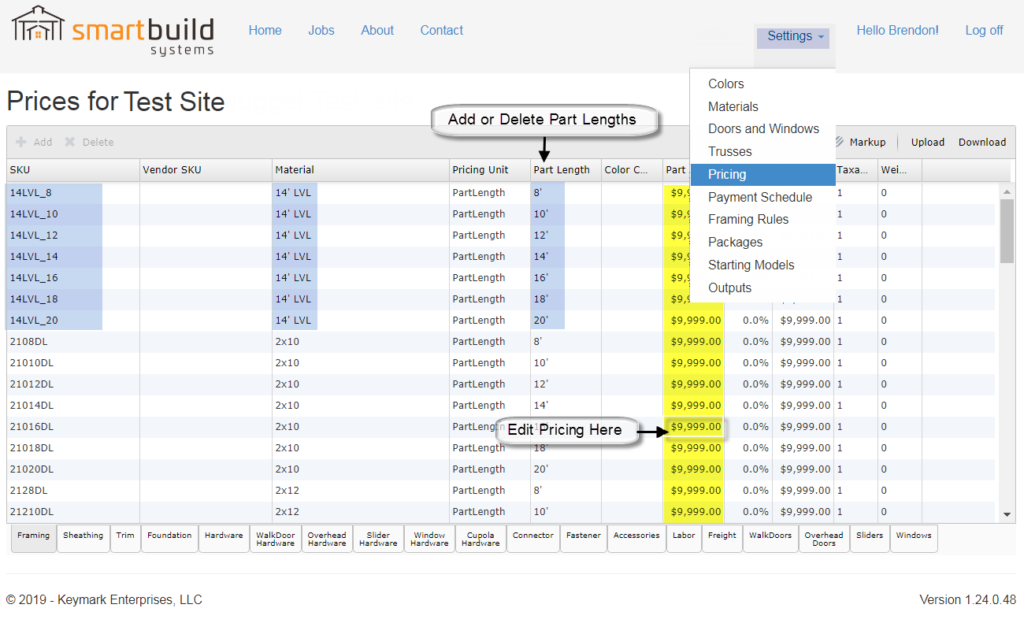
When adding or editing any material in SmartBuild, there are two different pages that control the material properties. First, the material must be added on the Settings/Materials page, then after a material is added, use the Settings/Pricing page to add or delete part lengths, colors and update pricing.
To change a part length of an existing trim or lumber material, on the Pricing page, double-click on the part length and type in a length. (Note: the part lengths for Framing parts can only be rounded to the nearest foot). To delete a part length, select just a single line item, or multiple line items by holding down the Shift or Ctrl buttons, and use the Delete (trashcan) button to remove them from the Pricing list. To add a part length, just select a part that’s already on the Pricing page list and click the Add button. A new line item with a 1’ foot length will be added to the list, then double click the new 1’ foot length and edit to the desired length.
Here are some examples for adding a basic Framing part like LVL on to the Materials and Pricing pages:
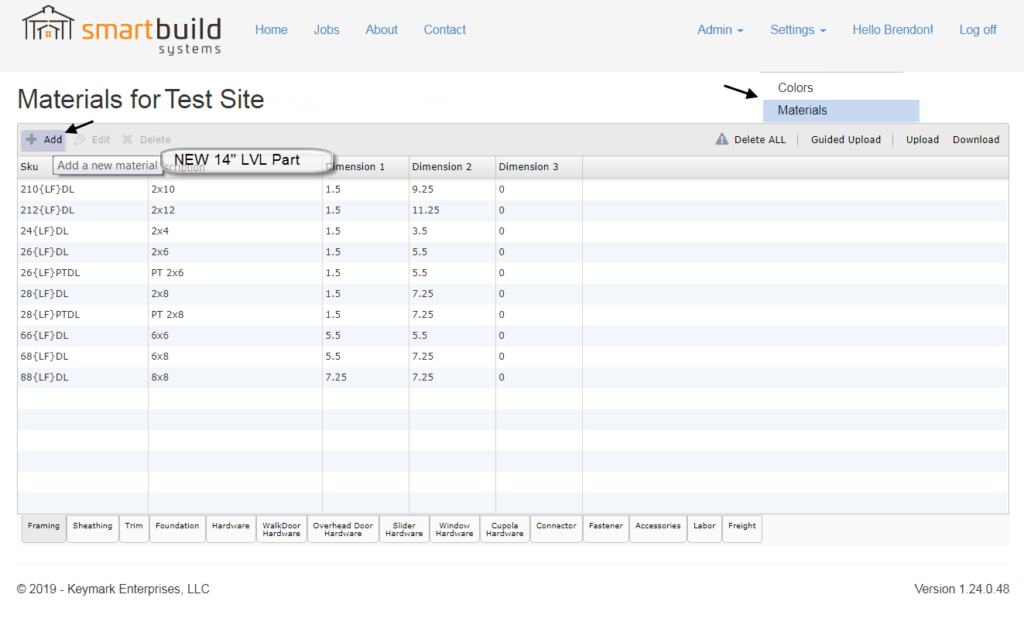
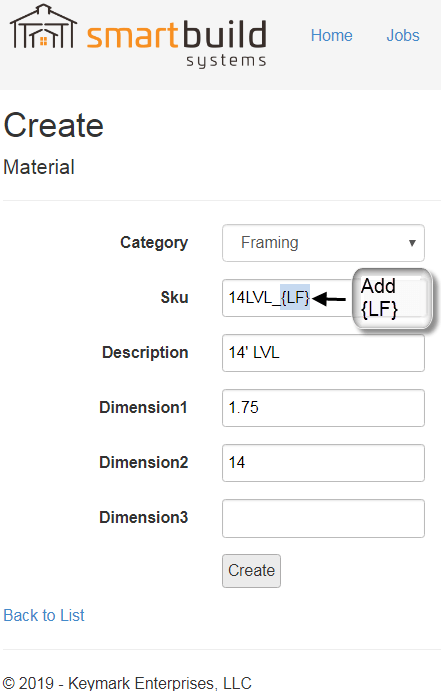
The new part must be first added on the Materials page, with a {LF} included in the SKU. The {LF} is required by the program to allow for multiple part lengths for the LVL. Add a Description and fill out the relevant dimensions in decimal inches (see example above). Once added on the Materials page, you can then edit the part lengths and prices together on the Pricing page.
Generally, if you have more than one or two parts, it is more efficient to use a CSV or Excel upload to get new parts into the system. Upload the file on the Materials page using the following format:

Setting up a template with just the SmartBuild Categories and Headings is a good place to start. If you don’t already have a template go to the Materials page and use the Download button to download the current Materials CSV or Excel file, and save just the first row with all the Heading and save it as a template.
Headers required in Materials file:

Adding Trim Parts
Because there are so many different combinations of trim lengths and colors, always add Trim part by using the file upload on the Materials page. Adding Trim parts is similar to adding a Framing part when it comes to adding {LF} to the SKU number, for the different part length, but because every Trim part also has a different color associated with them, use the {CC}. The {CC} is required by the system to attach colors to the trim parts. This makes for a lot of Trim part line items.
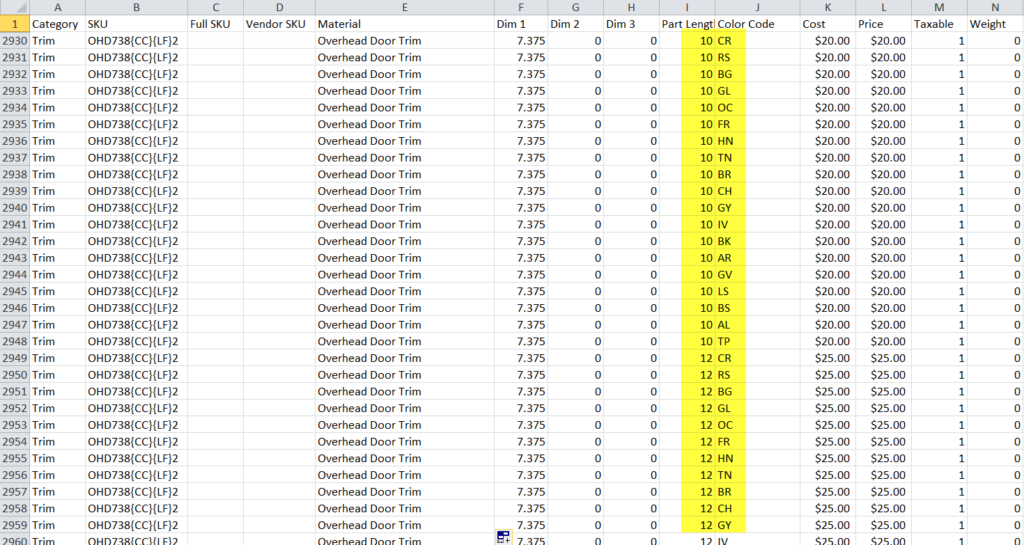
For example, adding a new trim part for Overhead Door Trim in 5 different part lengths and 20 different colors will be 100 individual line items. There are two different ways to create this parts list. One way is to enter each color code and each part length for the 100 different overhead Door Trim line items (see the picture above). The other way to quickly add a new trim part with different part lengths and all the different color codes is to use the * character in place of all the different color codes. The * works as a wild card in the Color Code column and tells SmartBuild to add that part length with each and every color in your system. See the example of the * color codes below. This set of 5 different part lengths will generate 20 different color codes each and 100 individual line items will get added to the Materials list and Pricing page.

Adding Doors and Windows
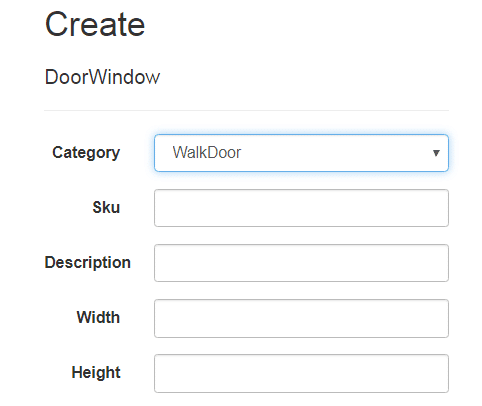
To add a new Door or Window part to the database use the Door and Windows page under Settings. There are 4 different opening type in SmartBuild: Walk Doors, Overhead, Sliders, and Windows. After clicking on the Add button, pick the opening type you want to add from the category pull-down. Only fill out the SKU, Description, Width, and Height. The width and height are in decimal feet (not feet and inches). There are no special requirements in SmartBuild for the SKU and Description for doors and windows, they can be anything that makes sense for your business. The rest of the settings on this page can be left blank for doors and windows. Once doors and windows have been created in Materials, then you can go to the Pricing page to update the pricing for all the doors and windows that have been added.

Adding Hardware Parts (‘Each’ items)
To add a new Hardware part, use the Add button on the Materials page. When adding a new Hardware part, first make sure to select the correct hardware category for the specific type of hardware you are adding. If there is a question about what category material belongs to, use the ‘Hardware’ category as a general catch-all category. Because most Hardware items do not have part lengths or colors they can be listed as “each” items with no {LF} {CC} codes necessary in the SKU field. So, Hardware SKUs and Descriptions can be whatever makes sense for your business. Note: Some Hardware items like Gutters and Vinyl Siding can also use a color code {CC} but it’s not required for most Hardware items. Each item can also be uploaded using the CSV or Excel format.
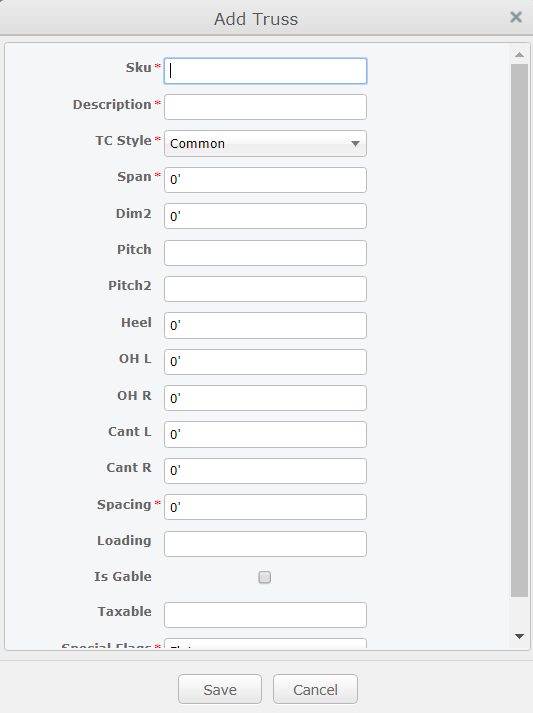
Adding Truss Parts
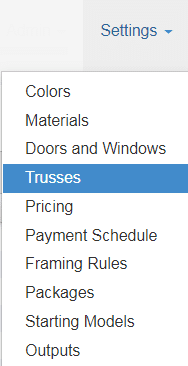
Adding Truss materials is a little different than adding any other material. The Trusses in SmartBuild have a separate database from the main Materials database (notice that there are no Truss parts listed when downloading the Material or Material Pricing CSV file). To add a single Truss, use the Add button on the Setting/Truss page. The truss menu that pops up has specific truss attributes (like span, heel height, spacing etc.) to define the truss that gets added. These truss attributes are used so SmartBuild can find the exact or closest matching truss based on the specifics of each job. When adding trusses to the Truss page first add a few basic trusses by using the Add button, then you can use the Download button to download the full Truss table in a CSV or Excel format, and then use the downloaded file as a template to add and fill out the rest of the Trusses. For each truss that gets added make sure there is also a corresponding Gable-End Truss. These truss pairs will have all the properties except the “Is Gable” will be ‘Yes’ for the gable truss, and the price will be different. The Truss pricing is also controlled on this same Truss table (no need to go to the Pricing page for trusses). Note that a few of the settings on the Truss table like Loading are not required and can be left blank unless otherwise noted. For more information about adding Truss parts or any other part types, please review the how-to documents and videos on our support page.
Getting all your materials into SmartBuild takes some upfront work. By identifying the part you are uploading and following the guidelines above, you should be able to load all your materials into SmartBuild in a relatively short period of time. Once the materials are set up, you are ready to begin using SmartBuild to streamline your process and gain more business!