
New Features:
Job flow:
We added a new Job Status in the Workflow called “Prep”.
Some customers want to be able to change a few different things without having to re-Quote a job.
Like changing Quantity and Lengths of materials in Job Review and Drawings. You cannot change the model.
Before Prep mode you still have all the same functions of Edit, Quote, Re-Quote.
After Prep is the same also. You don’t have to do anything in Prep mode.
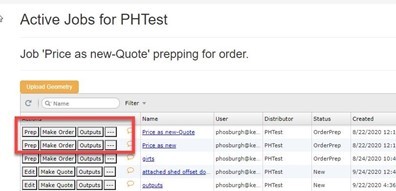
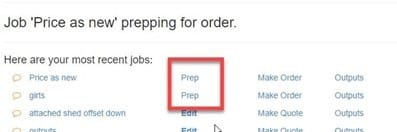
From the Jobs Page, you can select the Make Order button right after
And while on the Edit page of prep you can hit the Make Order button

To Prep for Order,
Mark the job Quoted from the jobs list page.
This will enable the Prep for Order Button.

Select Prep for Order button,
a confirmation prompt will appear Select Yes.
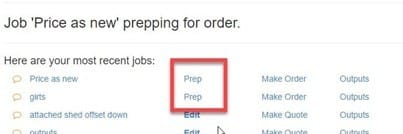
This will enable the Prep button on the Jobs Page.
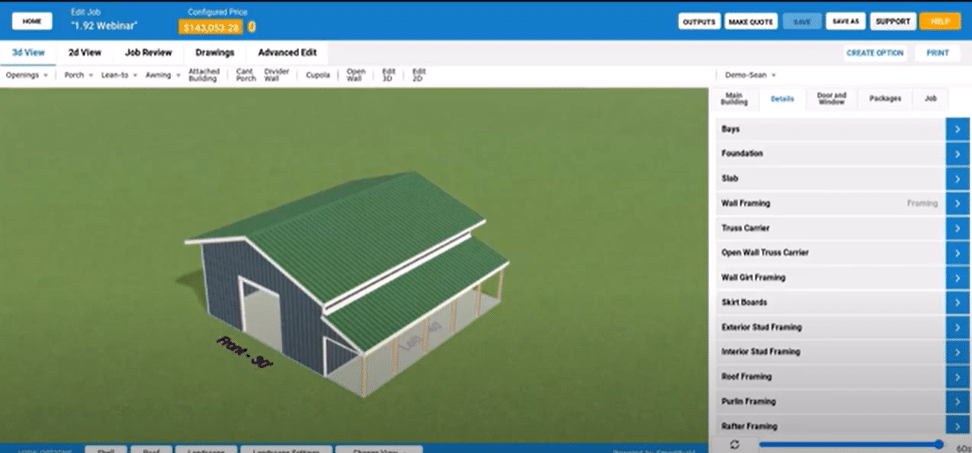
Select the Prep button to open the 3D model.
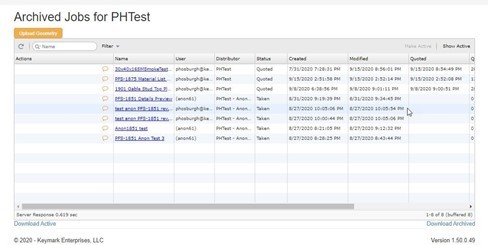
Also, When Prep for Order is selected.
This will make a copy of the Quote,
Rename original with -Quote suffix
and Archive it
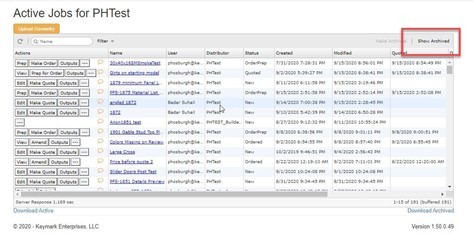
To Return to Active Jobs
Select the Show Active Button
Prep for Order will create a new job on the Active Job List
and job status is now Prep
at Prep status, we will allow certain edits
Once the model is open,
When you select the drawings button.
Then the Drawings page opens
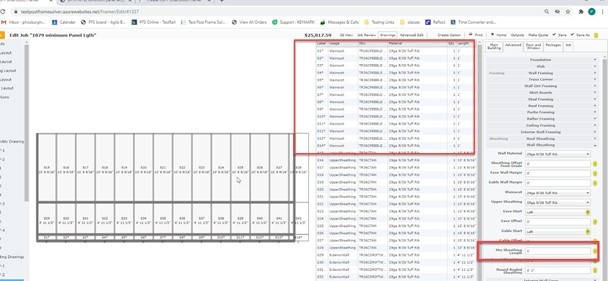
Select the desired Sheathing panel you would like to adjust for length.
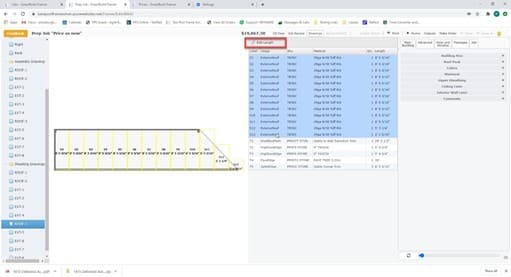
The sheathing panel list will appear along with the drawing of the roof segment’s panel layout.
By selecting the desired panel from the list on the right the Edit Length button at the top of the list will be activated.
This will also highlight in yellow the particular panel you wish to change in the layout on the left.
You can select 1, some, or all.
If you select dissimilar lengths only the longest length will continue to highlight once finished
By selecting the Edit Length button a new dialogue box will appear.
Type in the field measurement or revised length and select OK.
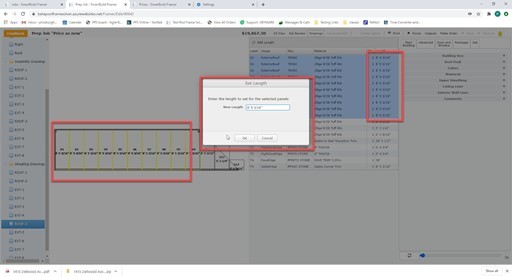
The selected panel length change will be reflected in the drawing and the panel list on the right.
This will also be reflected in the Price and Job Review
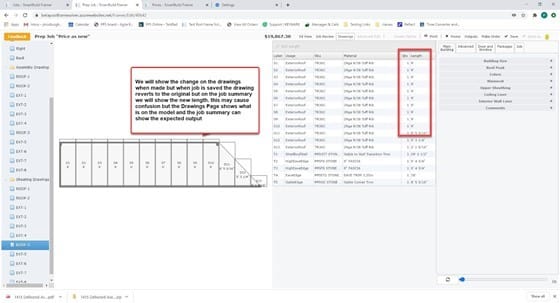
Please Take Note:
We will show the change on the drawings when made but when the job is saved the drawing reverts to the original
but on the job summary, we will show the new length.
this may cause confusion but the Drawings Page shows what is on the model
and the job summary can show the expected output
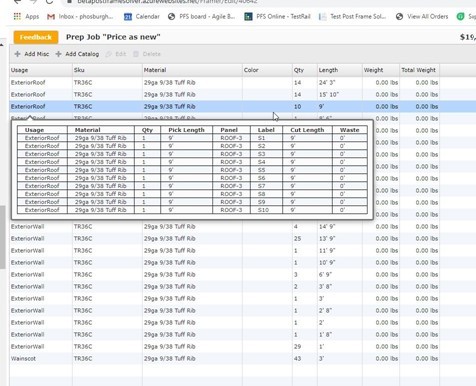
When On the Job Review Page
You can change the quantity of the materials to be sent with the job by just clicking on the Line Qty column
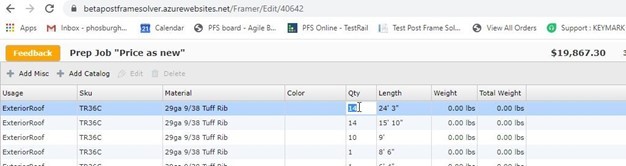
You can edit the square-cut and angle cut sheathing lengths in Drawings, material list qtys in Job Review,
These changes will not change the Quoted Price to the customer It will change the Output price when you make the job Ordered
the Price on the Edit page at the top will not change as this was the Quoted Price
the outputs and the Job Summary will reflect the new difference
Improve door and window placement delay
We have new indicator boxes that should be present until, and only until, the next server request completes base on how much Time is Set on your timer/refresh control
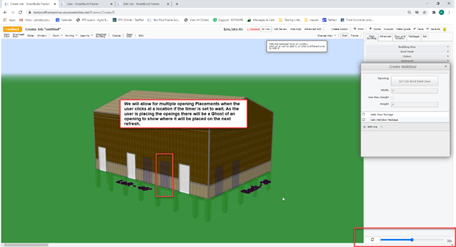
Switching modes or tabs should not remove them.
‘Add Opening’ and ‘Edit Opening’ for small openings (i.e. windows and walkdoors) work slightly differently now.
When adding an opening, the opening will snap to left, center or right of any bay that is wider than the opening.
When editing an opening, we will snap to 1-inch increments as before. Large openings (i.e. Overheads and Sliders) should be unaffected.
Angled sheathing part length adjustments
Just like the existing Roof Margin control we have created an Angled Roof Margin. This will allow you to define how much of a Margin to have for Valleys and hips and on wrapped porch ceilings
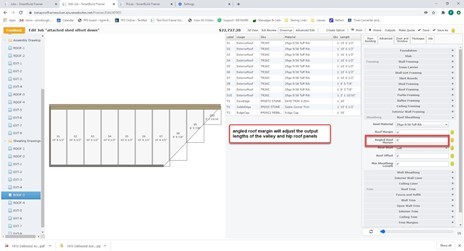
Go to Framing Rule and unhide the Roof Margin and Angled Roof Margin from Advanced>Roof Sheathing section
On the Edit Page Go to Advanced >Roof Sheathing Add Values for Roof Margin and Angled Roof Margin
Notice on the Job Review Page that Roof and Ceiling Sheathing will extend/be
shortened from the by an input amount
The added value in Roof and Angled Roof Margin is added in pick length for Sheathing
We are no longer Showing the Extra margin lengths in the Drawings or on the Edit screen
All Angled lengths should add extra length to corresponding values in the field Adds extra length to all angled panels
Round Angled Sheathing
We Have a new control for rounding the Wall Sheathing> Round Angled Sheathing
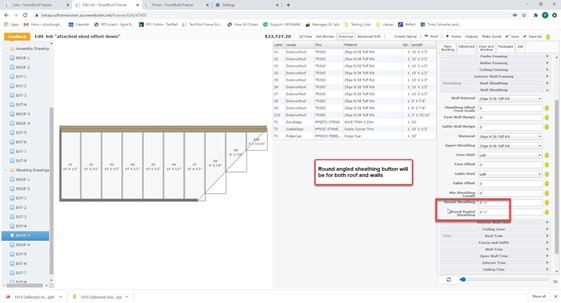
This will take the Cut Length and Round it up to the nearest number of inches or feet input
This will show the Pick length on the Job Review
The new questions should default their value to your existing Round Sheathing and Roof Margin settings and hidden status’ to their non-angled counterparts at the time of the initial upgrade.
The new questions only apply to sheathing parts where one or both ends have either 1 distinct point (i.e. triangular panels) or two distinct points that are not horizontal. Notched parts and double-cut parts are not considered ‘angled
Improve Quick Openings buttons:
Include Roof Framing and Advanced checkbox in Quick button dialogs
Minimum panel length for sheathing:
We Added two new “Min Sheathing Length” questions (WallMinimumSheathingLength, RoofMinimumSheathingLength).
This is to allow for you to utilize Scrap pieces around the job site.
When Pieces are less then 6” you will not see these on your material outputs
These are new length fields that control the minimum length of sheathing that will be added to the material list.
This is above the “Round Sheathing” question for walls and below the “Roof Offset” question for roofs.
The new questions are hidden and set to 0′ by default. Roof and Ceiling sheathing uses the roof question.
Wall, wainscot, upper sheathing and interior wall sheathing use the wall question. Soffits do not follow any minimum length.
This minimum is applied before margins, rounding or consolidation. When a part is dropped from the material list,
a * is appended to the end of the label