Wrapping up the garage remodel series
Well, here we are. Eight posts later, 5 months have passed, the garage remodel is officially done- just in time for my daughter’s summer break.
If you’ve been following along from the beginning — from framing decisions and vapor barrier debates to steel liner panels and bird boxes, first of all, thank you. It’s been a fun project to document, and honestly, writing about each step made me think through how contractors and builders use Smartbuild everyday in the field. If you’re new here and want to catch up on the full series, we’ll have a full recap next week. You’ll find links to all the previous posts.
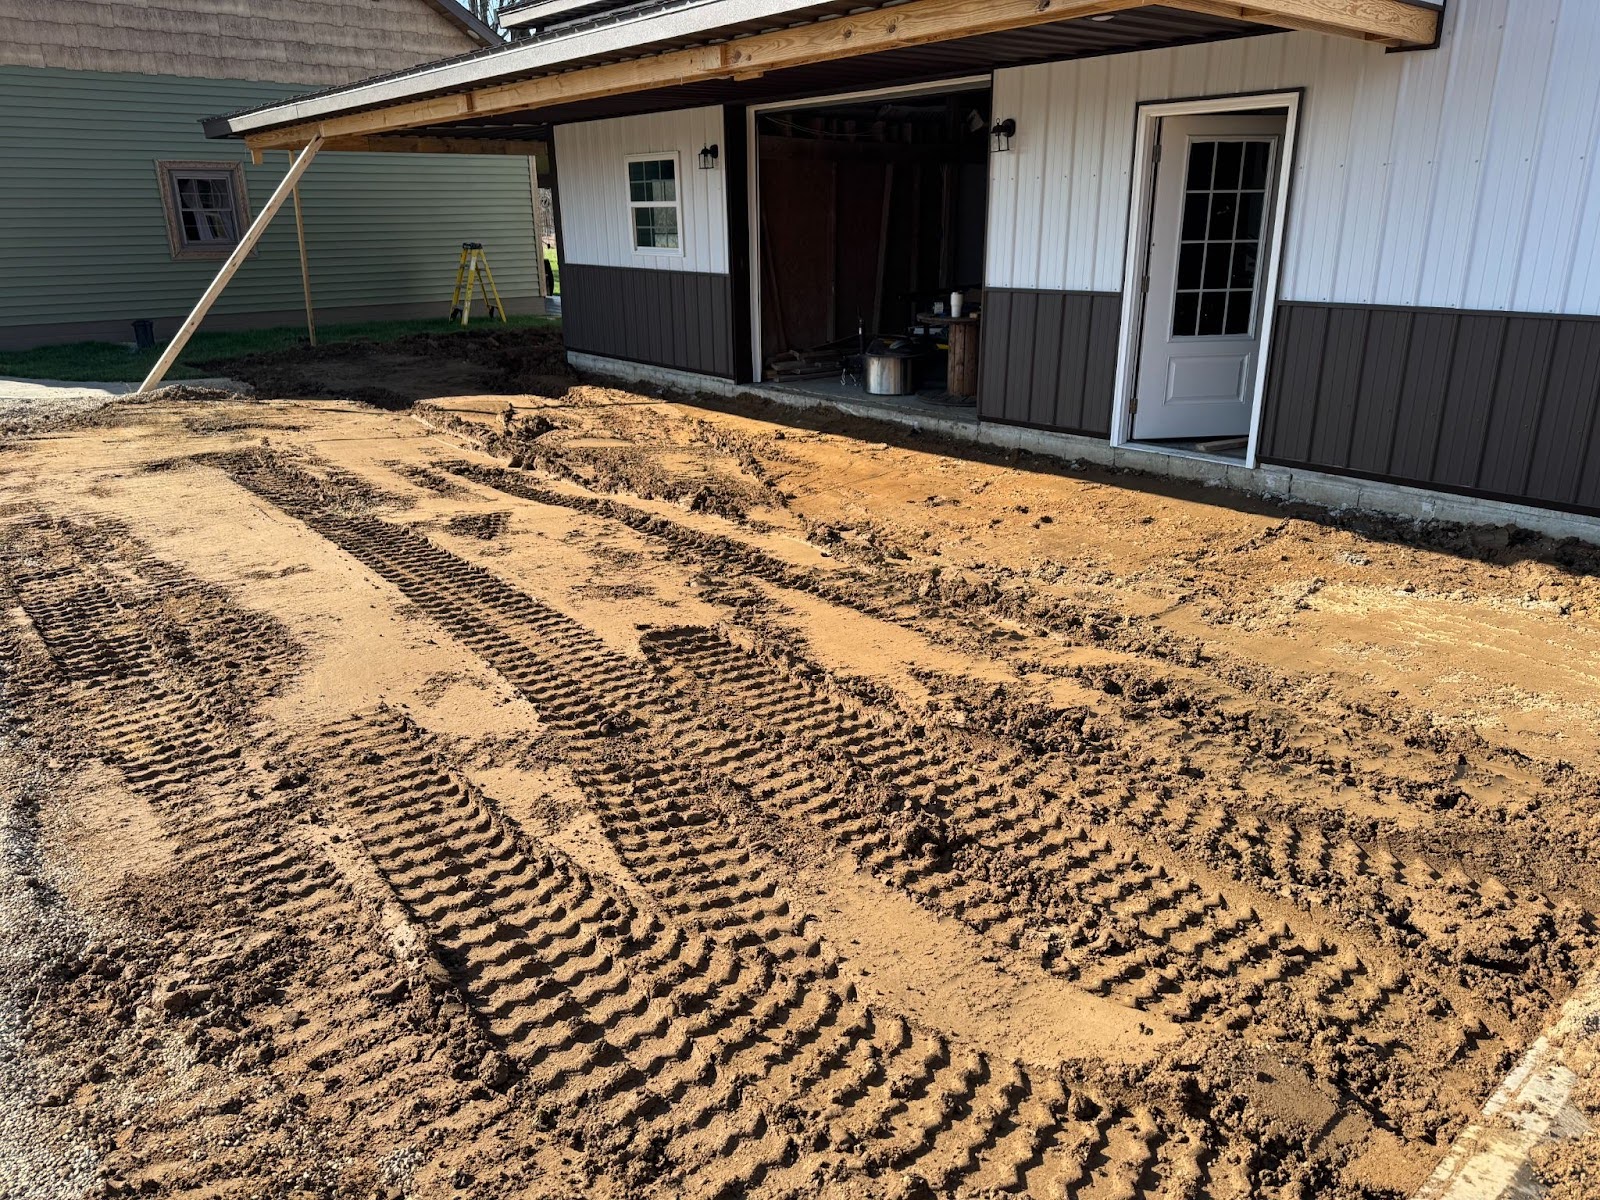
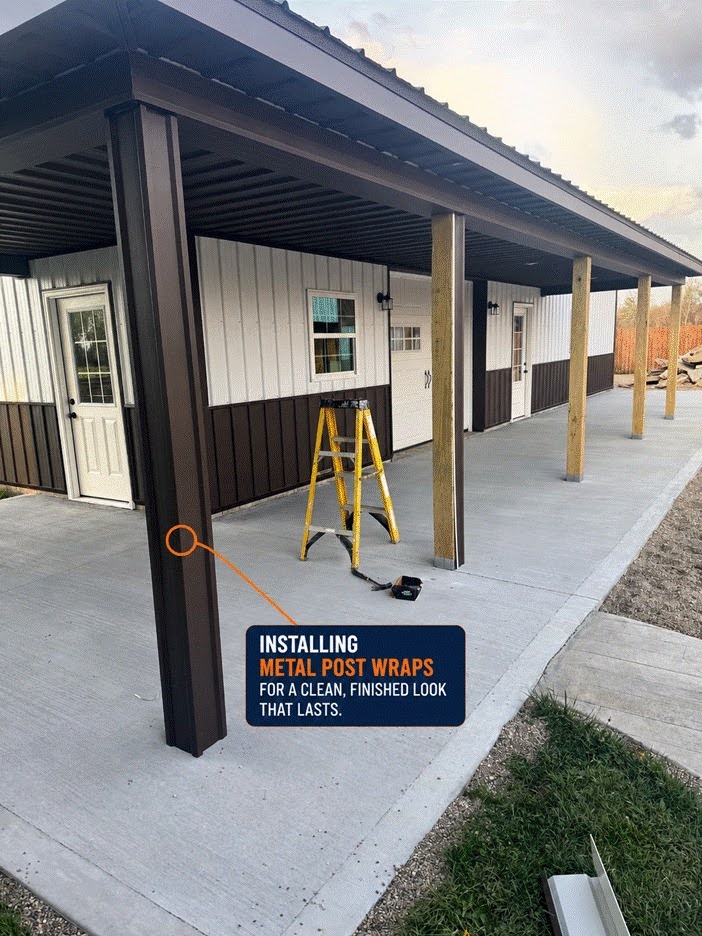
The last two finishing touches were small compared to what came before. A few weeks ago, I spent one evening installing post wraps. Then last week, I sealed the concrete floor under the porch. Neither job was complicated. Neither one took very long. But I’ll tell you what — they made a huge visual difference. There’s a gap between a project being “done” and a project being finished, and it’s usually the little details that can seem to make all the difference.
Post Wraps — The Clean Finish
For the post wraps, I went with a 2-piece snap-on design from DC Metal. If you haven’t seen these before, the concept is beautifully simple: two halves that snap together around the structural post, completely covering it. No visible fasteners. No fussing with screws or trim pieces. Installation was about as straightforward as it gets. You just line it up, snap it on, and you’re done.
And once it’s snapped on? It’s not going anywhere. I mean where would it go, really?
The look is clean. You go from staring at a bare treated post to having a finished, uniform column that matches the rest of your interior. It’s one of those upgrades that seems minor on paper but completely changes how the porch feels when you walk under it.
Sealing the Concrete
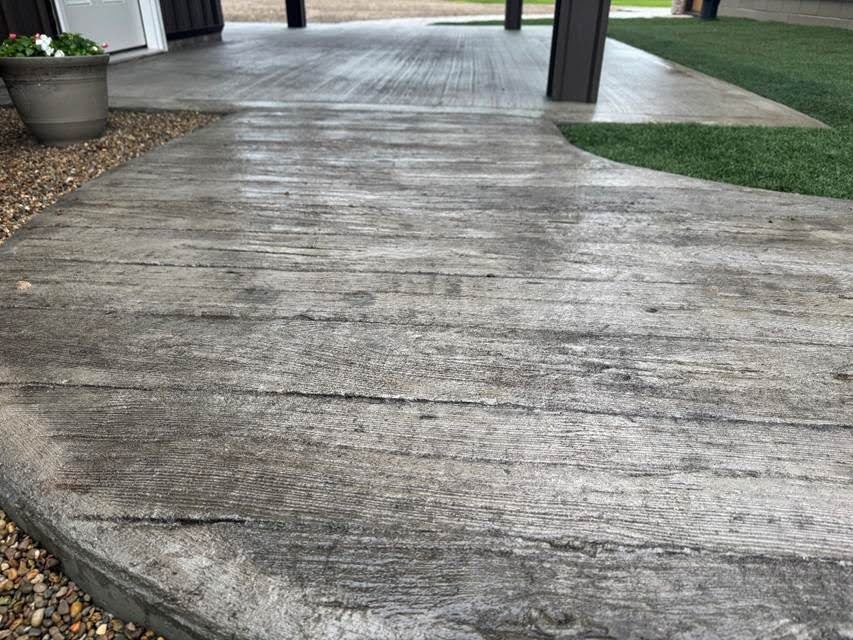
Last week I rolled a coat of sealer onto the new concrete under the porch, and that was officially the final step. It protects the slab from stains and moisture, gives the whole floor a cleaner, more uniform appearance, and takes several hours to apply. It’s one of those tasks that’s easy to skip but once you see the difference, you’re glad you didn’t.
One tip if you’re planning to do this yourself: seal it early. But not too early. The longer you wait, the more dirt, oil, and stains work their way into the concrete — and then you’re spending half a day deep-cleaning the slab before you can even crack open the sealer. You’re supposed to wait 28 days so the concrete can fully cure – though I probably didn’t wait quite that long – it was a couple weeks. I wanted to seal it before the floor had a chance to collect much dirt. I used a tinted brown sealer from Home Depot to accent the stamped wood sidewalk section – making that area almost look like a rustic wood.
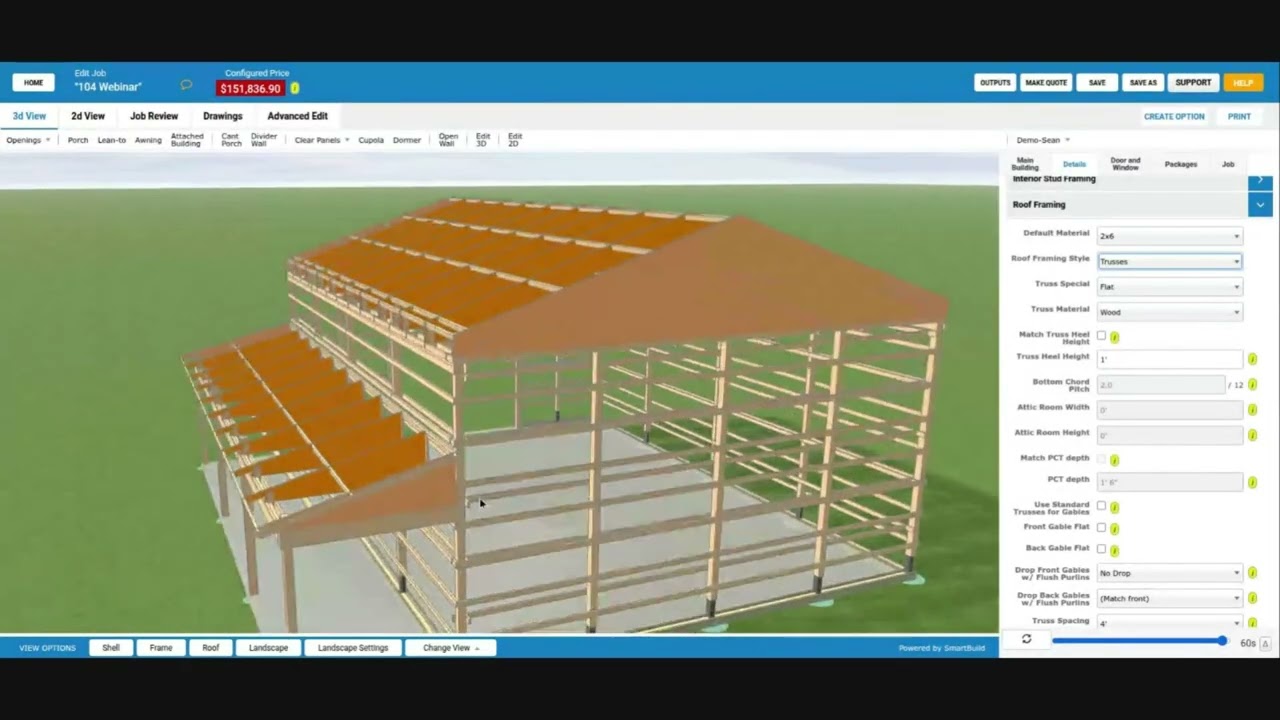
A Quick Note for the Sales Side — Post Wraps in SmartBuild
Now, for this project calculating post wraps was a no-brainer. Count the posts, order the wraps, done. But I work at SmartBuild, so I can’t help but think about this from the sales perspective too.
SmartBuild added support for post wraps in the past year. You can set them up as a trim part in the system with accurate pricing tied to your supplier costs. If you’ve been following along since Part 2, you might remember that the post wrap feature wasn’t fully functional when I originally created my material takeoff. That’s been fixed since, and post wraps now work as a standard trim part in SmartBuild. And here’s why that matters:
If you’re a salesperson bidding several projects a day, you don’t have time to manually calculate post wrap costs for every quote. But when it’s already set up in SmartBuild, it becomes a one-click addition to any proposal. That means you can sit down with a homeowner and say: “Here’s what it costs to leave the posts unfinished. And here’s what it costs to wrap them.” Side by side. Clean and simple. It’s just giving the customer a clear choice. And more often than not, when they see the price difference for that kind of visual upgrade, they go for it. It’s a genuine value-add for the customer and a straightforward upsell for the builder.
Woodgrain Printed Metal – Almost
One trend I’ve been watching — and hearing a lot about from SmartBuild customers — is the rise of woodgrain printed metal. These are steel panels and trim pieces that have been digitally printed with realistic wood, stone, or other textures. And honestly, the quality has gotten to the point where you have to touch it to know it’s not real wood. I seriously considered wrapping the post and beams in one of these colors – but decided I wanted the bolder – dark bronze look instead
With all the woodgrain options on the market now, post wraps and trim – even timber trusses wrapped in metal are getting more popular. People want the warmth and character of wood without the maintenance headaches. Printed metal gives them exactly that.
One name that comes up a lot in the industry is Tru-Steel HD . Here’s what makes their product stand out:
- Digitally printed at up to 400 dpi resolution
- Up to 32-foot pattern repeat — most competitors repeat every 3–4 feet, which can look obviously repetitive
- 40+ standard images including woodgrain, stone, and metal finishes
- 20-year warranty on vertical panels
- 100% made in the USA
Full disclosure: SmartBuild is not affiliated with Tru-Steel HD in any way. I’m mentioning them because we genuinely hear a lot of praise from our customers about their products, and the samples I’ve seen in person look remarkably realistic. It’s just an honest industry observation — they’re doing impressive work.
As these printed metal materials become more mainstream, having them set up as options in your design software — with real pricing — makes quoting even faster. A customer asks, “What would it look like in woodgrain?” and you can show them the cost difference in seconds rather than scrambling to build a custom quote later.
That covers the hands-on side of the project — post wraps, sealed concrete, and a look at where the industry is heading with woodgrain printed metal.
In the next and final post, I’ll recap all 8 posts in this series and share a few things I learned along the way. Stay tuned.
Frequently Asked Questions
How do 2-piece snap-on post wraps install?
It’s exactly what it sounds like — two halves that snap together around the post. You position one half on each side, press them together, and they lock in place with no visible fasteners.
Do post wraps come in different styles?
Yes. Options range from basic smooth metal in standard colors to woodgrain printed finishes that look remarkably like real wood. Some builders simply use 4 pieces of angle (fascia) trim to cover each side of the post – though a 2 piece snap on is by far a favorite technique if your supplier makes them.
What is woodgrain printed metal?
Woodgrain printed metal is steel that has been digitally printed with high-resolution images that mimic the look of real wood (or stone, or other natural materials). Companies like Tru-Steel HD print at up to 400 dpi with pattern repeats as long as 32 feet, which creates a very realistic appearance without the obvious tiling you sometimes see with lower-quality products. The result is the warmth of wood with the durability and low maintenance of steel.
Can SmartBuild quote post wraps?
Yes. SmartBuild added post wrap support as a trim part within the past year. Builders can set up post wraps with accurate supplier pricing, and then include them in proposals automatically. This means customers can see the exact upgrade cost for wrapping their posts — making it easy to present as an option during the sales process rather than circling back with a separate quote later.
How much do post wraps typically cost per post?
Pricing varies depending on material, style (standard color vs. woodgrain printed), and your supplier. Normally that’s anywhere from $40 – $60 for a 10’ porch post. That said, post wraps are generally an affordable upgrade relative to the dramatic visual improvement they provide. I’d recommend reaching out to your preferred supplier for a current quote — and if you’re using SmartBuild, you can build that pricing right into your proposals so it’s always ready to go.
Is woodgrain metal worth the premium over standard colors?
Honest take: yes, there’s a noticeable premium, but the visual impact is significant. When I’ve seen woodgrain printed panels in person, the difference compared to a standard solid color is striking — especially in customer-facing areas like finished garages, shops with showrooms, or barndominiums. My advice? Always offer it as an upgrade option and let the customer decide. Some will happily pay the premium. Others will stick with standard. Either way, you’ve given them the choice, and that’s what it’s all about — giving the customer options.
Should I seal my garage concrete floor?
A concrete sealer protects your slab against stains, moisture penetration, and everyday wear. It’s easy to apply — typically just a roll-on process — and it makes a noticeable difference in the floor’s appearance, giving it a cleaner, more polished look. For the minimal time and cost involved, it’s one of those finishing touches that’s absolutely worth doing. It’s recommended to wait 28 days before sealing any newly poured concrete pads to avoid weakened or shipping surfaces.